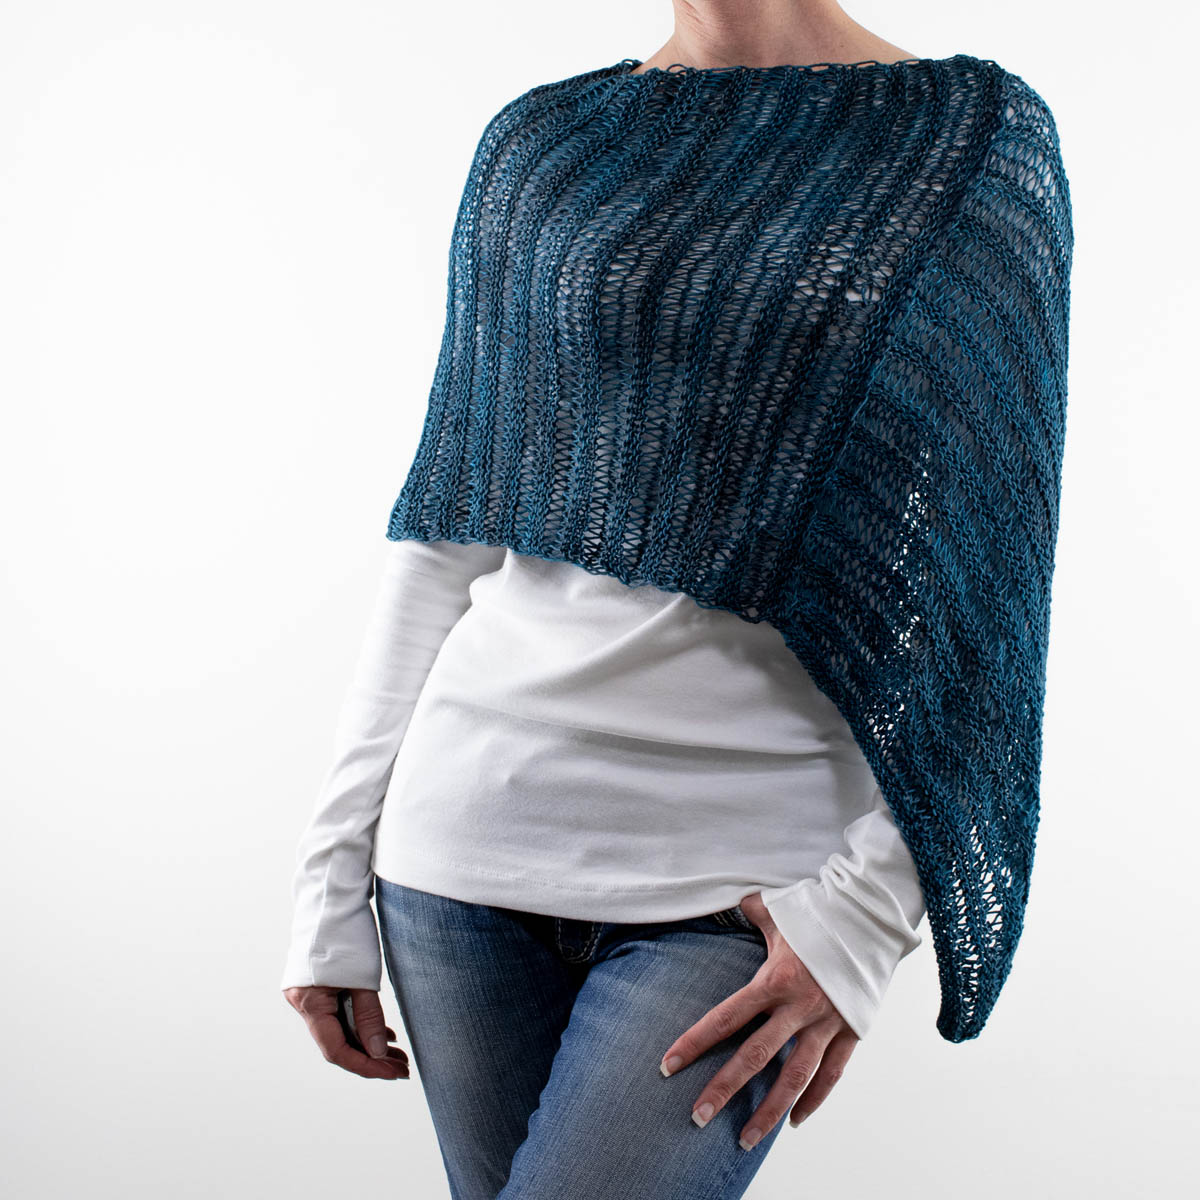
Easy Poncho Knitting Pattern
This post may contain affiliate links. Please read my disclosure policy.
This is an easy poncho knitting pattern using a worsted weight yarn, so it knits up relatively quickly and it’s great for spring, summer and fall!
Get the free knitting pattern below or purchase the ad-free, downloadable & printable PDF on Etsy, Ravelry or Brome Fields.
Pin-it to Pinterest for later!

About the Pattern
Available Sizes: 7
Pattern Format: Written Pattern, No Chart
Pattern Language: English
Skill Level: Advanced Beginner
PDF Format: Printer Friendly
Pattern Name: Hazy Sunrise
Techniques
Here are some of the knitting skills you need to know before getting started:
Knit Flat (Back & Forth)
Knit & Purl Stitches
Pick-up Stitches
Sew Seams
Yarn & Substitutions
Yarn Weight: Bulky
Yardage: 328 – 1092 yards (300 – 999 meters)
Suggested Yarn: Lion Brand Landscapes Renewed
Needles & Notions
US 10.5 (6.5mm) Circular Needles with a 32” (80cm) Cable
Gauge
15 STS & 21 rows per 4” (10cm) square, knit in the garter stitch after steaming

Get the free knitting pattern below or purchase the ad-free, downloadable & printable PDF on Etsy, Ravelry or Brome Fields.
Details
Model height: 5’9″ (175cm)
Model weight: 130lbs (59kg)
Model bust: 35″ (88cm)
Model waist: 25″ (63cm)
# of CO stitches: 45
Measurements, after steaming: 32″ wide x 13″ (81cm x 33cm)
Gauge: 15 STS & 21 rows per 4” (10cm) square, knit in the garter stitch, after steaming
Weight: 12.3oz (350g)
Notes
Not reversible.
The CO edge is the length.
The body is knit using the garter stitch & rib stitch for the top edge.
The body is knit flat, back & forth using circular needles, if your size requires few enough stitches you could knit it using straight needles. I find the circular needles to be easier on my hands though.
First you’re going to knit the body section and then pick-up the stitches of a long edge on the body section to knit in top ribbing.
For the top edge, the circular needles are used to accommodate the large number of stitches you need to pick up.
Knit 2 rectangles, block with a steamer, knit the top ribbing, sew 2 side seams to create the arm holes and then sew 2 top seams to create the head hole.
Knitting Abbreviations
*– * – repeat between * to end of row
BO – bind-off in pattern
CO – cast-on (long-tail cast-on method)
K – knit stitches (K1 means to knit 1 stitch)
P – purl stitches (P2 means to purl 2 stitches)
STS – stitches
Save it for Later
- Buy the ad-free, printer-friendly pattern on Etsy, Ravelry or Brome Fields.
- Save it to your Ravelry Library!
- Pin-it to Pinterest for later!

Sizes
Adult Sizes, after steaming (L x W) (# of Cast-on Stitch) (# of skeins needed):
XS 9″ x 28″ (22cm x 71cm) (CO 30 STS) (2 skeins)
S 11″ x 30″ (28cm x 76cm) (CO 37 STS) (2 skeins)
M 13″ x 32″ (33cm x 81cm) (CO 45 STS) (3 skeins)
L 15″ x 34″ (38cm x 86cm) (CO 53 STS) (3 skeins)
XL 17″ x 36″ (43cm x 91cm) (CO 60 STS) (4 skeins)
2XL 19″ x 38″ (48cm x 96cm) (CO 68 STS) (5 skeins)
3XL 21″ x 40″ (53cm x 101cm) (CO 75 STS) (5 skeins)
Pattern Instructions
Body:
CO the number of STS from the size section above.
Knit in garter stitch until it measures the width from the section above, or desired length.
Knit the second body section the same as the first.
Blocking:
Steam-block the body section lightly, which will add 1-2″ of length.
Top Ribbing:
Pick-up the stitches of a long edge on the body section. The front and back are the same, so pick the one that you like the direction of the colors. Knit in the K1, P1 pattern, knitting into the knit stitches and purling into the purl stitches for 5 rows and then bind-off in pattern.
Repeat on the second body section.
Top Seams:

Put the “wrong” sides together.
Starting from the outside, seam the top seam, leaving a hole just large enough to fit your head through. Make sure the seams from the outside to the inside are the same measurement.
Mine measures 32″ wide and the head hole width is 10″. Each top seam measures 19″.
I usually create an 8″ head hole, but I wanted this one to be a little wider, so I can wear it off the shoulder. You can make yours even wider if you’d like. 😀
I, personally, like this seam, but you’re more than welcome to use a different method to make it look seamless.
Side Seams:

Starting from the bottom, seam each side using the mattress stitch, leaving a hole large enough to fit your hand and arm through, my arm hole measures 7″ wide.
Weave in the ends.
Print this Pattern
I know many of you enjoy working from a paper copy of your knitting pattern that’s why I offer a printer-friendly PDF completely ad-free on Etsy, Ravelry or Brome Fields.
That way you can have lifetime access to it and download it to any device and view it from anywhere, without ads (and the pattern might not be around forever).
The ads on this website make it possible for me to offer the patterns for free, that way you can try it before you buy it. :)
More Cozy Knitting Patterns you’ll love…
Get the free knitting pattern above or purchase the ad-free, downloadable & printable PDF on Etsy, Ravelry or Brome Fields.